Cake pops are all the rage now – taking baked cake, crumbling it up into tiny pieces and then slapping a can of frosting in the mix, rolling into balls and putting it all on a stick – GENIUS!
I saw a version of this new fad on pinterest from Play Eat Grow, only these ladies added an extra, super fun step, and instead of placing the cake balls on a stick, they stuck them on an ice cream cone! Making a new, fun version of everyone’s favorite summer time treat. I took one look and knew that I had to try them. But I thought of making them a little differently by using brownies instead of cake. I just love brownies – not that I don’t love cake – but how can you go wrong with chocolatey brownies rolled into a ball on top of an ice cream cone? You CAN’T!
Brownie Cake Cones
INGREDIENTS
(makes about 8 brownie cones)
1 Box of brownie mix, prepared according to instructions
(cake like style)
1 can of your favorite chocolate frosting
1 Box of sugar cones
1/2 bag of candy melts
*I got the melting discs that you can buy at A.C. Moore or Michaels but any melting chocolate will do
Colored non-pareils
1) Prepare the brownies according to the instructions, using the cake-like recipe (fudgey style brownies would be hard to crumble). After the brownies have cooked and cooled off, crumble them into small pieces and place in a large mixing bowl.


2) Add 1/3 of the can of frosting to the brownie crumbles and mix. You can add frosting as you feel necessary. Most cake pop recipes call for an entire can of frosting, but I thought that the brownies are naturally a little more ‘fudgey’ than cake, so a lot of frosting wasn’t entirely necessary, but you can use your discretion.
3) Take a handful of the brownie frosting mixture, so that when you go to roll the mixture into a ball, it fills the palm of your hand. You want the balls to be large enough to fit in the sugar cones. You can test beforehand to make sure they’re large enough.


4) After you have your brownie balls rolled, chill them in the refridgerator for about 20 minutes, just so that they will hold their shape.
5) While the brownie balls are chilling, melt the chocolate melts over medium heat in a saucepan.

pink = PARTY!
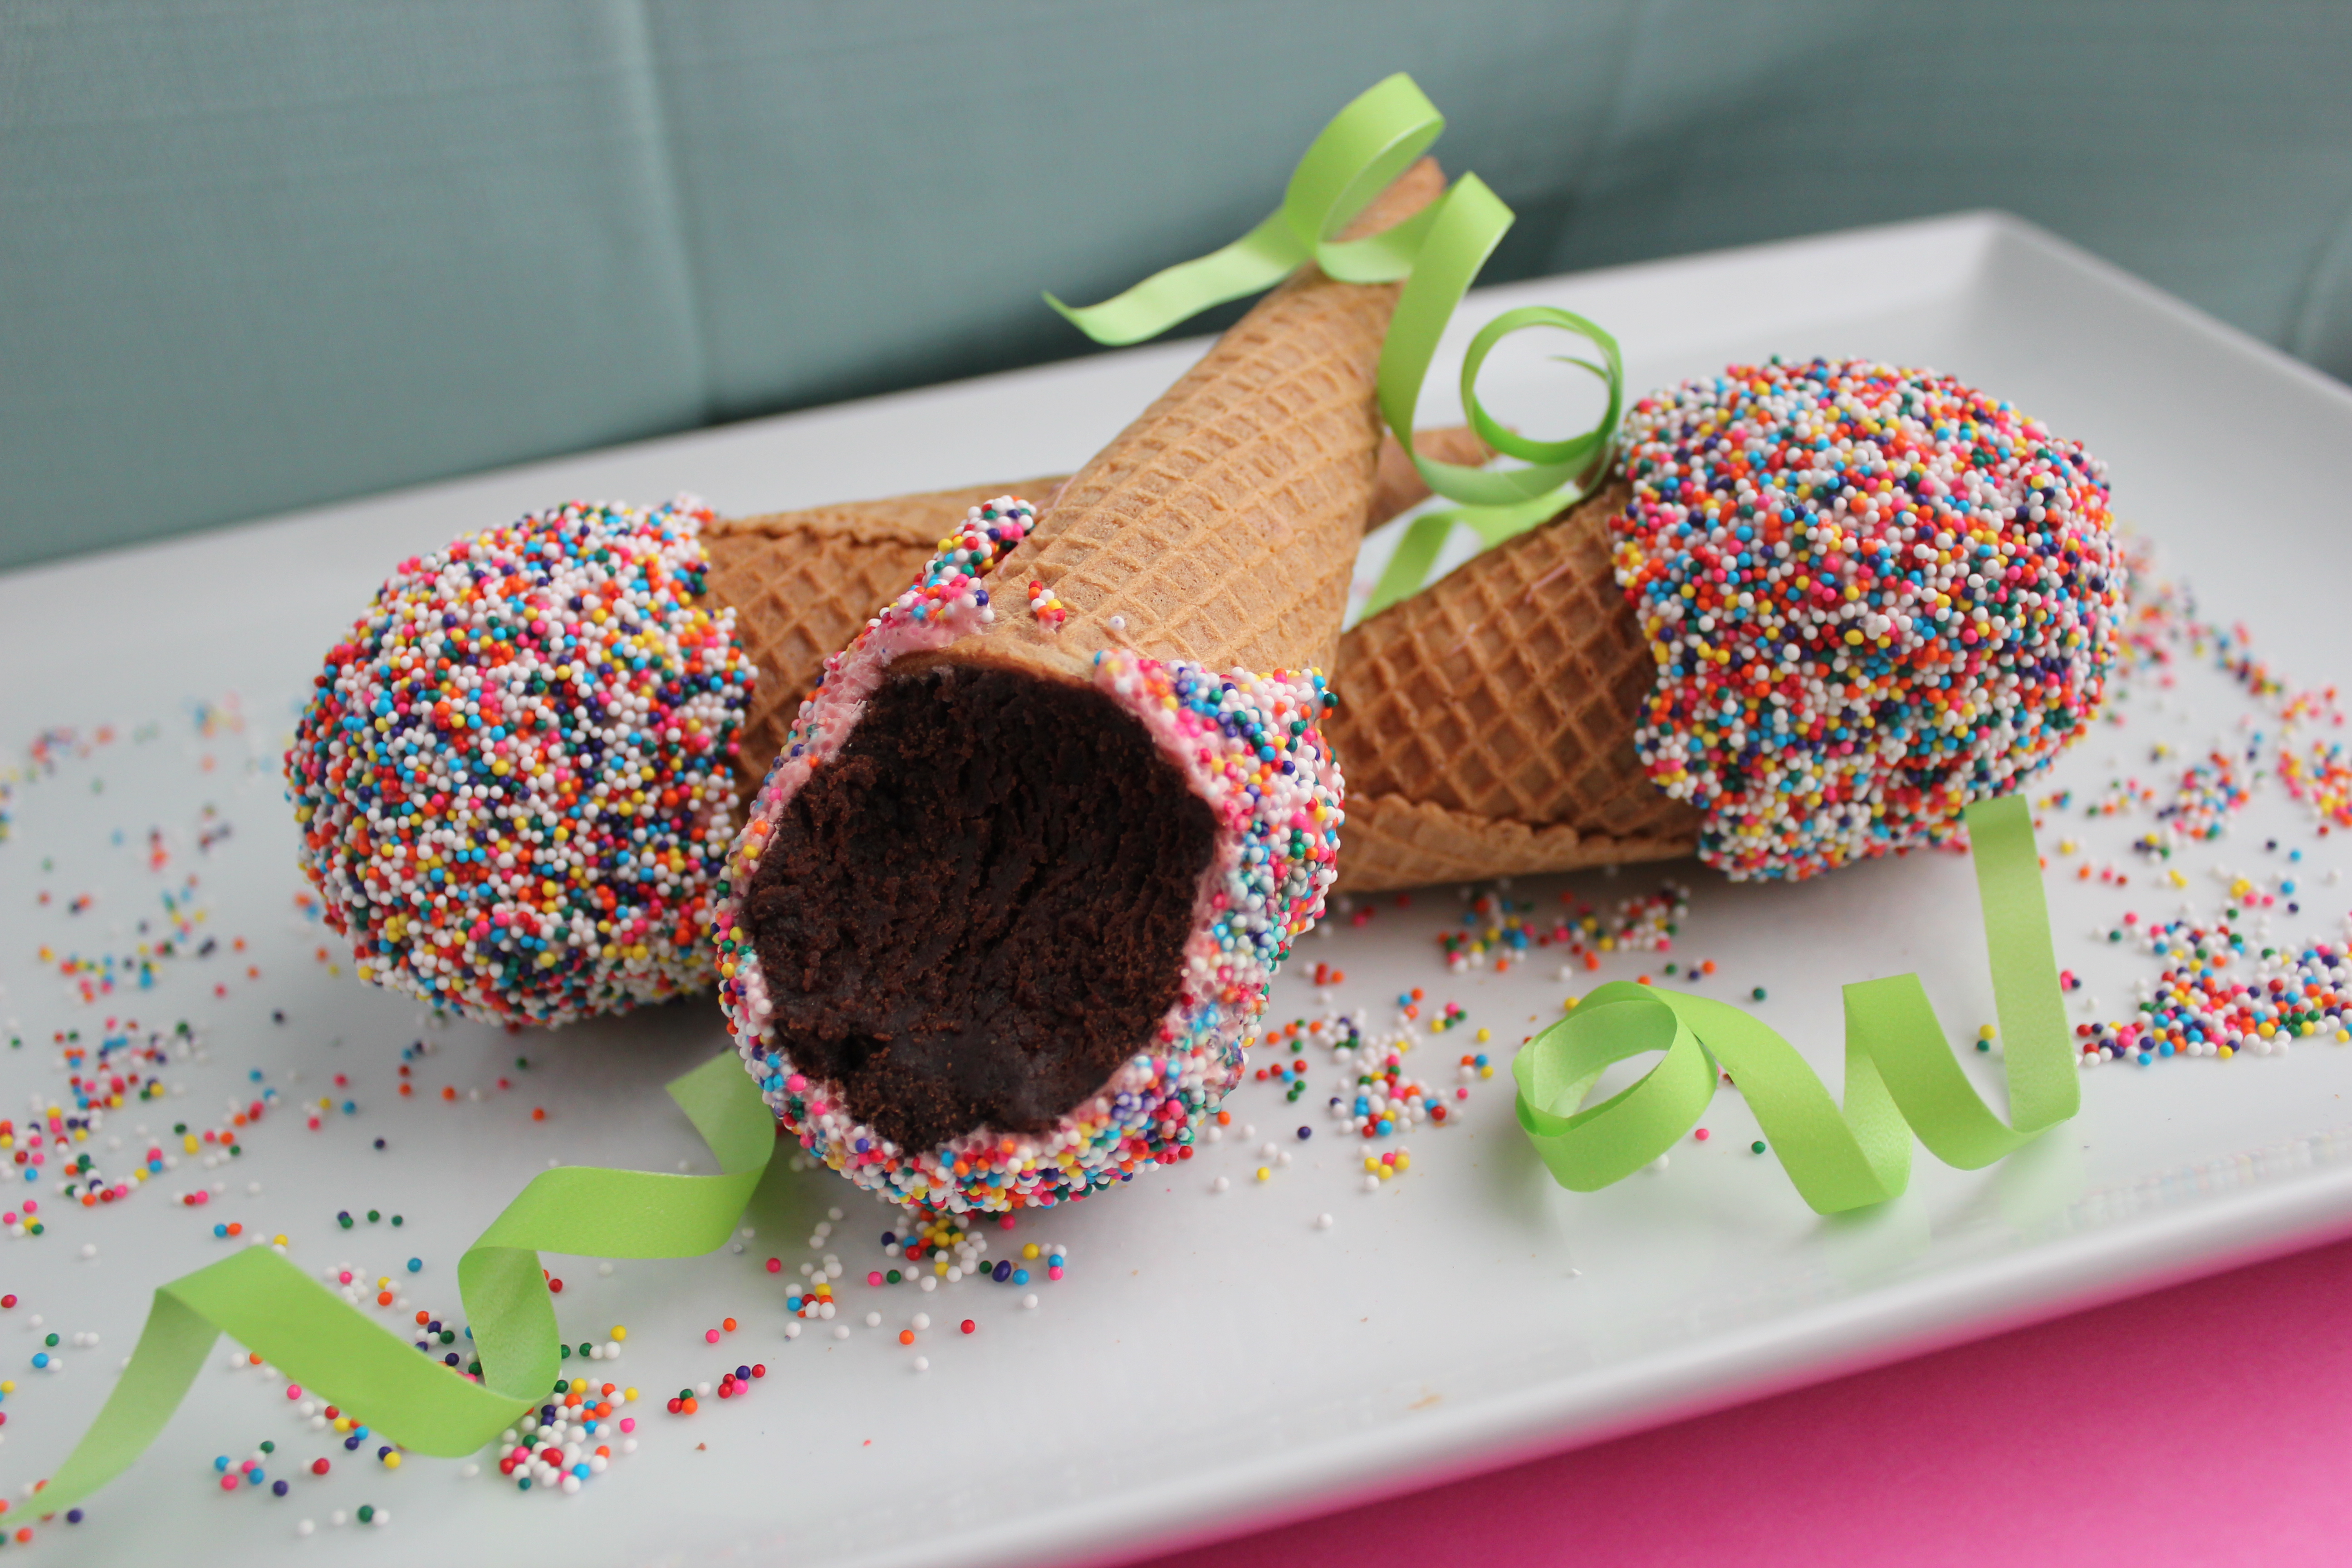
6) Take the brownie balls from the fridge and dip the bottom half of the ball in the chocolate and then place on the top of the cone so that the chocolate will fuse the brownie ball to the cone once it hardens.

7) After the brownie ball has been ‘glued’ onto the cone, take a spatula and spread the chocolate over the rest of the brownie ball. You could also take the cone and just dip it directly in the chocolate – I thought spreading it with the spatula helped to give more of a ‘drip’ effect, making it look more like ice cream.

8) While the chocolate is still melted, dip the cone in the non-pareils.

9) Let the cones/chocolate harden in the make shift cone holder.
These honestly came out so much better than I pictured! The brownie was perfectly soft on the inside, and the chocolate and non-pareils on the outside really gave it a nice crunch – and it’s on a cone! How can you go wrong? You can’t get a funner or more delicious dessert! And the best part is that they won’t melt all over your hands 🙂
Enjoy!

2 comments
These are really super cute! 🙂 I haven’t tried the cake balls with a brownie mix, sounds good!
They were delish Monica! I’m a huge brownie fan so I would highly recommend giving them a try vs. the cake mix – enjoy!
Comments are closed.